- Product Describe
-
Serial Number Model Working Dimensions Overall Dimensions Remarks 1 30L Horizontal Stainless Steel Inner Tank 255*360*330mm 660*495*585mm Stainless Steel Inner Tank 2 40L Vertical Plastic Inner Tank 325*320*365mm 470*500*685mm Plastic Inner Tank; One Layer Partition
First Layer: 325*320*155mm
Second Layer: 325*160*200mm3 60L Vertical Plastic Inner Tank 320*305*475mm 470*505*800mm Plastic Inner Tank; Two Layer Partitions
First Layer: 320*305*145mm
Second Layer: 320*305*125mm
Third Layer: 320*150*190mmApplications and Features
This equipment is suitable for low-temperature quick-freezing tests of various products, such as chemicals, physics, pharmaceuticals, instruments, meters, electrical appliances, marine biology, etc. It is used for low-temperature storage of vaccines and serums, microbiological research and cultivation, drug testing and storage, low-temperature testing of building materials, etc. The instrument consists of branded compressors, condensers, filters, capillaries, evaporators, constant temperature tanks, digital display instruments, and digital temperature control systems. The machine cools quickly, operates quietly, and is reliable and convenient to use.
Technical Parameter Box
Instrument Volume:
Vertical: 30L, 40L, 60L, 80L, 200L
Horizontal: 30L, 115L, 160L, 190L, 230LLowest Temperature: -25℃, -40℃, -50℃, -60℃, -80℃, -100℃
Temperature Control Accuracy (Uniformity): ±2℃ (also available with high precision ±0.5℃)
Compressor: Domestic compressor (also Brazilian Embraco imported compressor)
Power Supply: AC220V, 50Hz
Ambient Temperature: 0-23℃.
Relative Humidity: Not more than 75%
Structural Features
This instrument uses a top-opening door, thickened insulation layer for good low-temperature retention and convenient experiments. The constant temperature tank is made of highly corrosion-resistant alloy plate, with high-quality steel plate on the outside and filled with polyurethane insulation material in the middle.
Precautions
1. The instrument must not be stored or used in environments with moisture or corrosive gases.
When using for the first time (or after long periods of inactivity), the machine must operate for 2 hours before testing to avoid inaccurate initial readings.
2. In case of power outage or interruption, immediately turn off the power switch. If restarting is needed, wait at least 30 minutes before turning on the machine again to avoid compressor damage from rapid startup.
3. This instrument is suitable for laboratory testing.
4. It is strictly forbidden to run the machine for long periods when not in use.
5. During transportation, the tilt angle must not exceed 45° to avoid compressor or system damage. When in use, remove all packaging. Leave more than 50cm space behind the freezer and more than 15cm on each side from the wall. The freezer should be placed in a ventilated and dry place, avoid direct sunlight, and keep away from pools, heat sources, magnetic fields, and volatile or corrosive substances.
6. A dedicated socket must be used. The current capacity of the socket and wires should be no less than 10A, and the socket must be reliably grounded.
7. The power supply is single-phase AC 50Hz, voltage 220-242V. If voltage is unstable, install a voltage stabilizer with at least 5 times the input power. Use a stabilizer set to 220V 50Hz 15A. The instrument must be grounded.
Freezing Instructions
1. When placing samples, leave some space between samples and between samples and the inner tank to ensure air circulation and uniform cooling.
2. For samples with high humidity or prone to moisture loss, wrap them tightly with sealed food bags or cling film to prevent moisture escape and frost formation inside the chamber, which affects cooling.
3. It is strictly forbidden to store volatile or flammable gases and liquids in the freezer, such as strong alkalis, strong acids, gasoline, alcohol, etc.
4. Do not overload the freezer with samples at one time, as this will cause the compressor to run continuously and the temperature inside to drop slowly, failing to meet requirements.
5. After work, cut off the power, remove frozen samples, open the freezer door to allow natural warming, let frost melt, drain water, and wipe dry with a soft cloth.
Usage Instructions
1. Before using the quick-freeze box, carefully read the instruction manual.
2. Pre-start check: A) The quick-freeze box must have an independent power socket and reliable grounding. Voltage fluctuation range allowed is 220-240V, frequency 49-51Hz. B) Before connecting external power, check that the panel switch is in the off position.
3. Power On: Plug in the power supply and turn the power switch on the panel to the ON position. At this time, the display panel shows the cabinet temperature. After the computer temperature controller's preset delay start time, the compressor begins to operate.
4. Operation: Once the temperature reaches the required level, quickly and gradually place the stored items evenly inside the cabinet.
5. Power Off: After use, when you need to shut down, you must first turn the power switch on the panel to the OFF position (the display turns off), then disconnect the external power supply.
Maintenance and Care
1. The freezer should be cleaned after each test during use. When cleaning, cut off the power, remove the items, and wipe off any dirt and moisture.
2. Do not use boiling water, acidic agents, chemical solvents, etc.
3. After cleaning, wipe it dry.
4. When cleaning the door seal, please use mild soapy water and wipe carefully.
5. When cleaning the exterior, you can use water or a small amount of neutral detergent. Be careful not to let the power cord or lower wiring get wet to avoid moisture and electric leakage.
Common Faults and Troubleshooting Methods
1. Indicator does not light up; no instrument display after turning on the switch. Check the power supply and plug.
2. Indicator light is on, but the compressor does not work properly and only makes a buzzing sound. Voltage is low; install a voltage stabilizer with at least 5 times the input.
3. The compressor starts but stops within 1 minute, then after a few minutes restarts repeatedly. Follow troubleshooting step 2.
4. Compressor works normally but cooling is slow: ① Frequent door openings or door not closed tightly. ② Too many items placed inside or improper placement. ③ Freezer is frosted.
5. Excessive noise: ① Freezer is not placed on a stable surface. ② Freezer components are loose. ③ Contact between the refrigeration box and compressor.
The following phenomena are not faults; please do not worry.
1. When the quick-freeze box is working or shortly after stopping, the refrigerant circulates inside the pipes, producing a gurgling water sound.
2. When the compressor is working, the surface temperature may reach 70℃~80℃.
3. When the compressor starts or stops, the switch components may emit a slight clicking sound.
4. During rainy and humid seasons, frost may form on the cabinet surface; wipe it off with a dry cloth.
5. The inner side of the quick-freeze box lining is a stress relief area under ultra-low temperatures. Slight cracks may appear under alternating high and low temperatures, which is normal and does not affect use.
Repair Instructions
1. If abnormal phenomena or faults occur during use, please have a professional repair technician (or under manufacturer guidance) perform repairs.
2. Our factory provides free spare parts for domestic compressors (custom machines) within one year from the date of shipment, and free one-year warranty for imported compressors (standard machines).
3. Warranty period: One year from the date of delivery and acceptance, excluding fragile glass parts (custom machines are non-returnable). During the warranty, logistics costs are prepaid by the sender (who ships pays), spare parts are provided free by the factory, with technical support. If the compressor is replaced, the factory charges a service fee of 150 yuan, and refrigerant is provided free. For glass-covered low-temperature boxes, a quilt should be placed on the cover for insulation.
Note: 1. After unpacking, remove the base and keep ventilation.
2. Please keep the wooden crate packaging for repair use; otherwise, the user bears the cost.
3. It is strictly forbidden to operate continuously in environments above 35℃.
Digital Temperature Controller Instructions:
Quickly press the “set” button three times consecutively to enter the setting mode: first, the lower limit setting value is displayed (negative F). Use the up or down keys to select the lower limit value, then press the set key to lock it. The upper limit value (positive F) is displayed; use the up or down keys to select the upper limit value, then press set to lock it. The delay status Y is displayed—Y03 means a 3-minute delay before starting (must be set to Y03 to avoid compressor damage). Press set to lock the delay value. The JCC refrigeration mode is displayed (must be JCC). Press set to lock the refrigeration mode. The temperature calibration range C-6 is displayed (factory adjusted). Press set to lock. After waiting sixteen seconds, all settings are saved and the instrument displays the actual internal temperature. (After setting, you must press the set key once more and wait sixteen seconds before turning off; otherwise, the settings will not be saved.)
Setting example: (1) -25 degrees: lower limit negative F25, upper limit positive F22, delay Y03, refrigeration JCC, calibration C-6. (Special note: The horizontal line between negative F and positive F flashes to indicate below zero; otherwise, positive L and negative L indicate above zero.) (2) -40 degrees: lower limit -40, upper limit -37, refrigeration, Y03, JCC, C-6.
(3) -50 degrees: lower limit -50, upper limit -47, delay Y03, ... Wiring instructions: 1 neutral line, 2 live line. Refrigeration 1,3 output. 2,4 in series.
Special note about temperature calibration C-6:
If there is a discrepancy between the temperature inside the box and the temperature displayed on the instrument, quickly press the SET button three times: (1) "F" inverted appears, (2) press SET again to show "F" normal, (3) press SET again to show "Y03", (4) press SET again to show "JCC", (5) press SET again and the "Set" button will display "C-6" to set the internal sensor calibration of the box (calibration range -6 to +6). After setting, press the "SET" button once more to confirm the set value. For example: if the instrument shows -24 degrees and the internal box temperature is -25 degrees, then change C-6 to C-1.
Company Profile
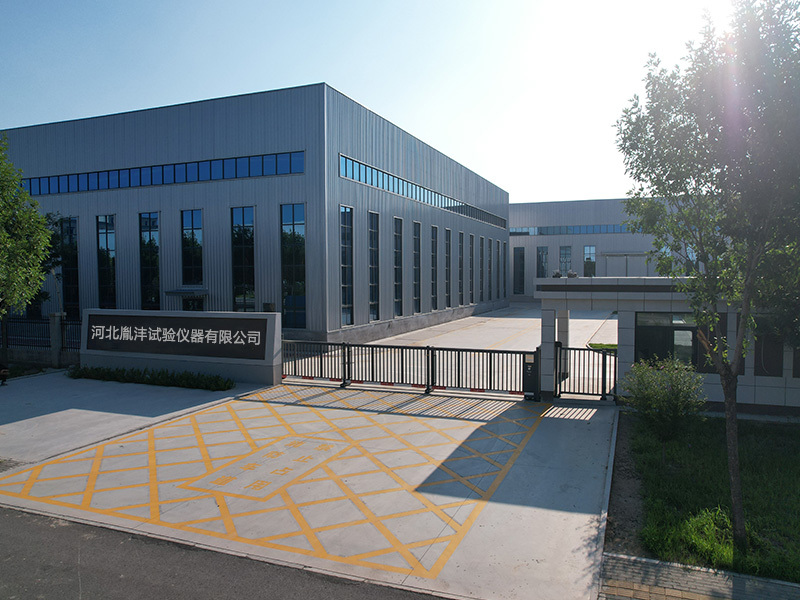
Hebei Yinfeng Experimental Instrument Co., Ltd. is a high-tech enterprise dedicated to the research and development, production, and sales of experimental instruments. The company is headquartered in Hebei Province, relying on the strong industrial foundation and technological innovation resources in the Beijing Tianjin Hebei region. It is committed to providing high-precision and high reliability testing equipment and solutions for material testing, engineering quality control, scientific research experiments and other fields.


Customized Delivery Process
We provide customers with full-process services ranging from pre-sale consultation, customized solution design, equipment installation and commissioning to after-sale technical support.
Online Communication
Provide Custom Drawings
Merchant Quotation
Sign A Contract
Processing And Production
Packaging And Distribution
Confirm Receipt Of Goods
Successful Transaction
Previous:

30L Horizontal Non-Windowed Low Temperature Test Chamber
If you need customized products, Contact US !
Category
Tag list
Request a Quote
We will contact you within one working day. Please pay attention to your email.
Related Products
Content update in progress


